#+HTML_HEAD: <link rel="stylesheet" type="text/css" href="../webpage-assets/ce.css" />
#+HTML_HEAD: <link rel="icon" type="image/png" href="http://rachel.likespizza.com/web-assets/images/favicon-moose.png">

# ---------------------------------------------------------------- #

* Lesson 00: Thinking about Computer Graphics

You should get a [[file:../handouts/planning-sheets.png][Handout]] with the gamescreen grid and the sprite
grid on it for this lesson!

** How do we know *where* things are?

We have to tell a computer how to do everything. A lot of software
has been written over the years that make things more graphical, but
if you boil it all down, the computer really only understands
numbers. Luckily, we have a way to represent *location* with
numbers...!

[[file:images/coordinate-plane.png]]

If you've covered *coordinates* in your math class, you might
already be familiar with this! However, the computer doesn't use the
/algebra/ coordinate plane - why would we need negative locations on
a computer screen?

Instead, the computer's coordinate plane for the screen looks like
this:

[[file:images/coordinate-plane-computers.png]]

With the computer's screen space, we begin at the very *top-left* of
the screen. This is our origin - (0, 0). Think of it like typing on
a typewriter - it starts at the top-left of the paper!

We use *x* to represent the *horizontal* position of something -
that's left or right. We use *y* to represent the *vertical*
position of something - that's up or down.

** What are the locations on the Tic-80 screen?

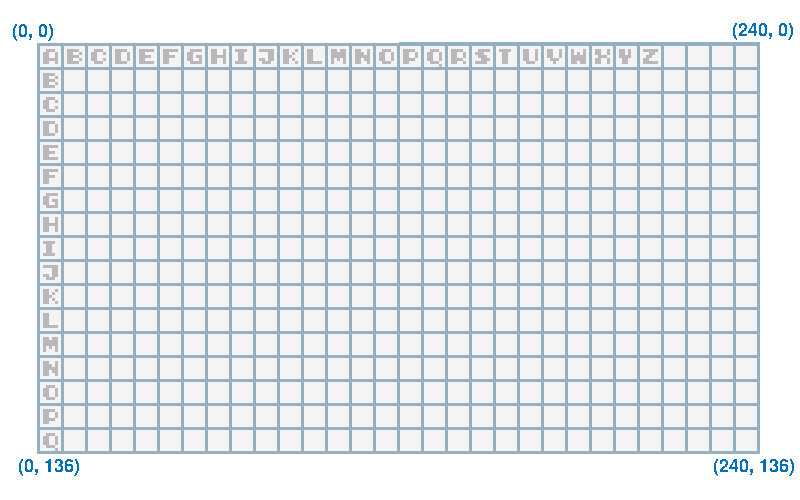
In Tic-80 games, we have our screen layout like this:

[[file:../handouts/gamescreen-grid.png]]

The top-left is (0, 0), and as we move /to the right/ the *x*
increases. As we move /downward/ the *y* increases. If we go all the
way to the opposite bottom-right corner, that is position (240,
136). So, you can make your *x* values anywhere from 0 to 240, and
your *y* values anywhere from 0 to 136.

** What else is this useful for?

When we draw art for our game, we have a similar layout for the
*canvas* we draw on, except the canvas is much smaller. In Tic-80,
each "image" (or "sprite") is 8 pixels wide by 8 pixels tall...

[[file:../handouts/sprite-grid.png]]

... so we draw very simple art, like this:

[[file:../handouts/sprite-grid-example.png]]

Each pixel we can choose a color and fill in that block.

** Practice with the handout!

With the printable Handout you can do a little planning for your
games before we get into the editor itself.


#+BEGIN_EXPORT html
<div class="attention-box cf">
  <div>
    <img src="../handouts/gamescreen-grid.png" style="float:right; width:500px;">
    <h3> STUDENTS! </h3>

    <p> In our next lesson we'll start with writing text to the
    screen to write out a story!</p>
    <br>
    <p> On the big screen grid, look at the size of the letters,
    and then plan out what text you want to put in your story and
    how to make it fit on the screen!</p>

    <div style="clear:both;"></div><br>

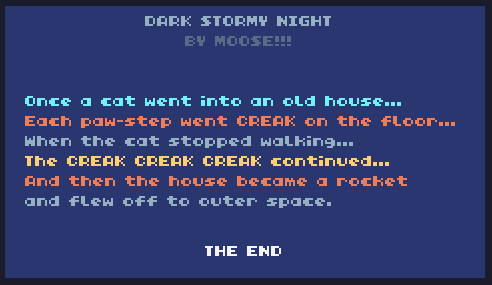
    <img src="images/lesson01-example2.png" style="float: right;">
    <p>It should be a short story, like this example!</p>
    <p>
    You will be able to choose your text, the position of the text,
    and the color of each line of text!
    <br><br>
    What will you make?
    </p>
  </div>
</div>
#+END_EXPORT

** Back to the course page!

[[http://courses.moosadee.com/GameDevelopmentTic80/][⬅️ Once you're all done, go back to the course homepage!]]